

If you've got a desktop tower sitting on the floor under your desk right now, you already know the drawbacks. It's a dust magnet, it blocks airflow to the intake fans, it's an easy target for a rolling chair wheel or a stray kick, and it takes up floor space you'd rather use for a footrest or nothing at all. I've walked into more than a few home offices around Columbus, Ohio where the tower had visible dust bunnies packed into the front vents after just a few months on the carpet. That's not just an eyesore, it's a real thermal problem for the machine you're relying on to earn a living.
The fix is to get the tower up off the floor entirely, and the cleanest way I've found to do that in a home office is an under-desk CPU mount. I've installed the VIVO Under Desk and Wall Office PC Mount in more home offices than I can count at this point, mostly because it adjusts to fit towers from 3.5 to 7.8 inches wide, holds up to 22 lbs, swivels out for easy cable access, and locks down tight once it's loaded. Below is exactly how I mount one, start to finish, in under 20 minutes flat, timed on my own setup last week. I'll walk through the same five steps I use every time, including the two spots where people usually go wrong the first time out.
Before you grab a random bracket, get the one built for adjustable towers
This mount adjusts from 3.5 to 7.8 inches wide, holds up to 22 lbs, and swivels for full cable access. See today's price and current availability on Amazon before you start the project.
Amazon Check Today's Price on Amazon →Step 1: Measure Your Tower and Clear the Mounting Zone
Before you touch a screwdriver, measure your tower's width at its widest point, usually across the front bezel or the intake fan grille. The VIVO mount I use adjusts from 3.5 to 7.8 inches, which covers the vast majority of mini towers and mid towers on the market, but it's worth confirming before you start rather than finding out halfway through the job. Grab a tape measure and check the width in two spots, top and bottom, since some cases taper slightly toward the front.
Next, get down on the floor and look at the underside of your desk where you plan to mount it. You want a flat panel with at least an inch and a half of clearance below it once the tower is loaded, plus enough depth that the case won't collide with your leg or a support beam when it swings out on the track. I usually pick a spot just to the right or left of center, close enough to the power strip that the cables reach without stretching tight.
Before you start, gather a Phillips screwdriver, a tape measure, a pencil, and a drill with a small pilot bit if your desk is particleboard, which most are. The mount ships with its own screws and a hex key for the cradle arms, so you shouldn't need to run to the hardware store for anything beyond a drill if you don't already own one. Unplug the tower completely and vacuum out the dust while you're down there, since this is the easiest access you'll get to the intake vents for months.
Step 2: Attach the Sliding Track to the Underside of the Desk
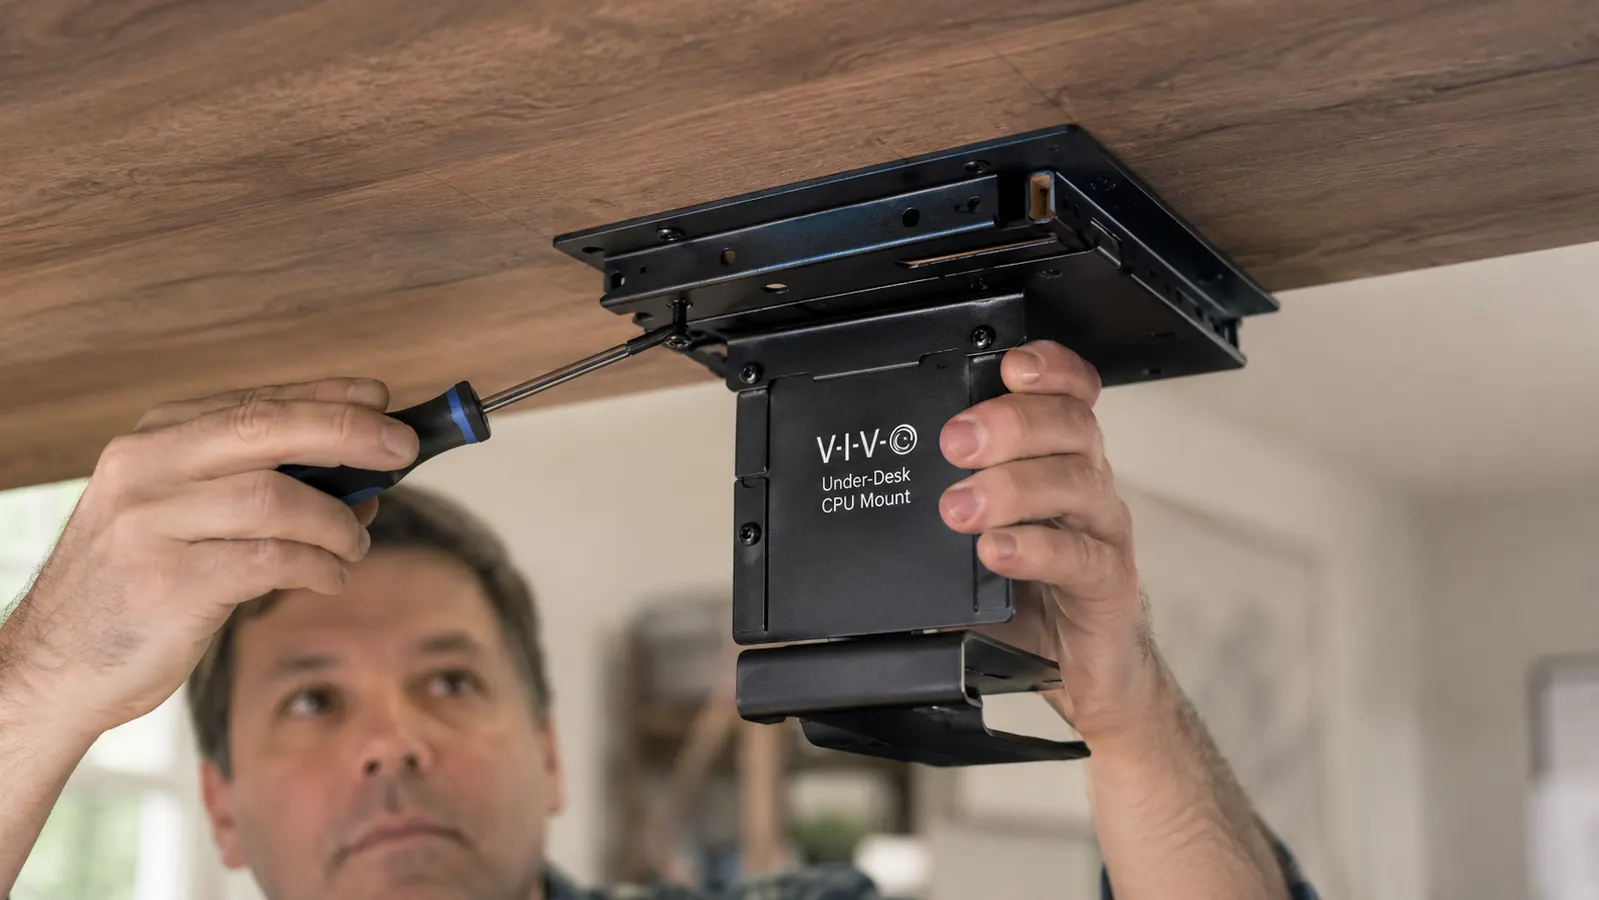
The mounting hardware starts with a metal track that runs front to back under the desk. Hold it up to the spot you cleared and mark your screw holes with a pencil, working directly against the wood rather than eyeballing it from a few inches away. Most desks, including the particleboard tops common in home offices, take wood screws without any issue, but if you've got a hollow core or laminate desk, check for a solid rail underneath before you commit to a hole.
Pre-drill each hole with a bit slightly smaller than the screw shaft. This matters more than people expect, because driving a screw straight into particleboard without a pilot hole is the single most common way I've seen these mounts loosen up within the first month of use. A stripped hole under a loaded desk is a bad time. Once the pilot holes are set, screw the track flush against the underside of the desk, checking that it sits level front to back as you go.
I keep a small torpedo level in my toolbox for exactly this step. Once the track is screwed in, set the level flat against it and check both directions. A track that's slightly off level won't affect function much, but it will make the tower hang crooked, and that's the kind of thing that bugs me every time I glance under a desk and notice it. Two extra minutes here saves you from redoing the whole job.
Step 3: Load the Tower Into the Cradle
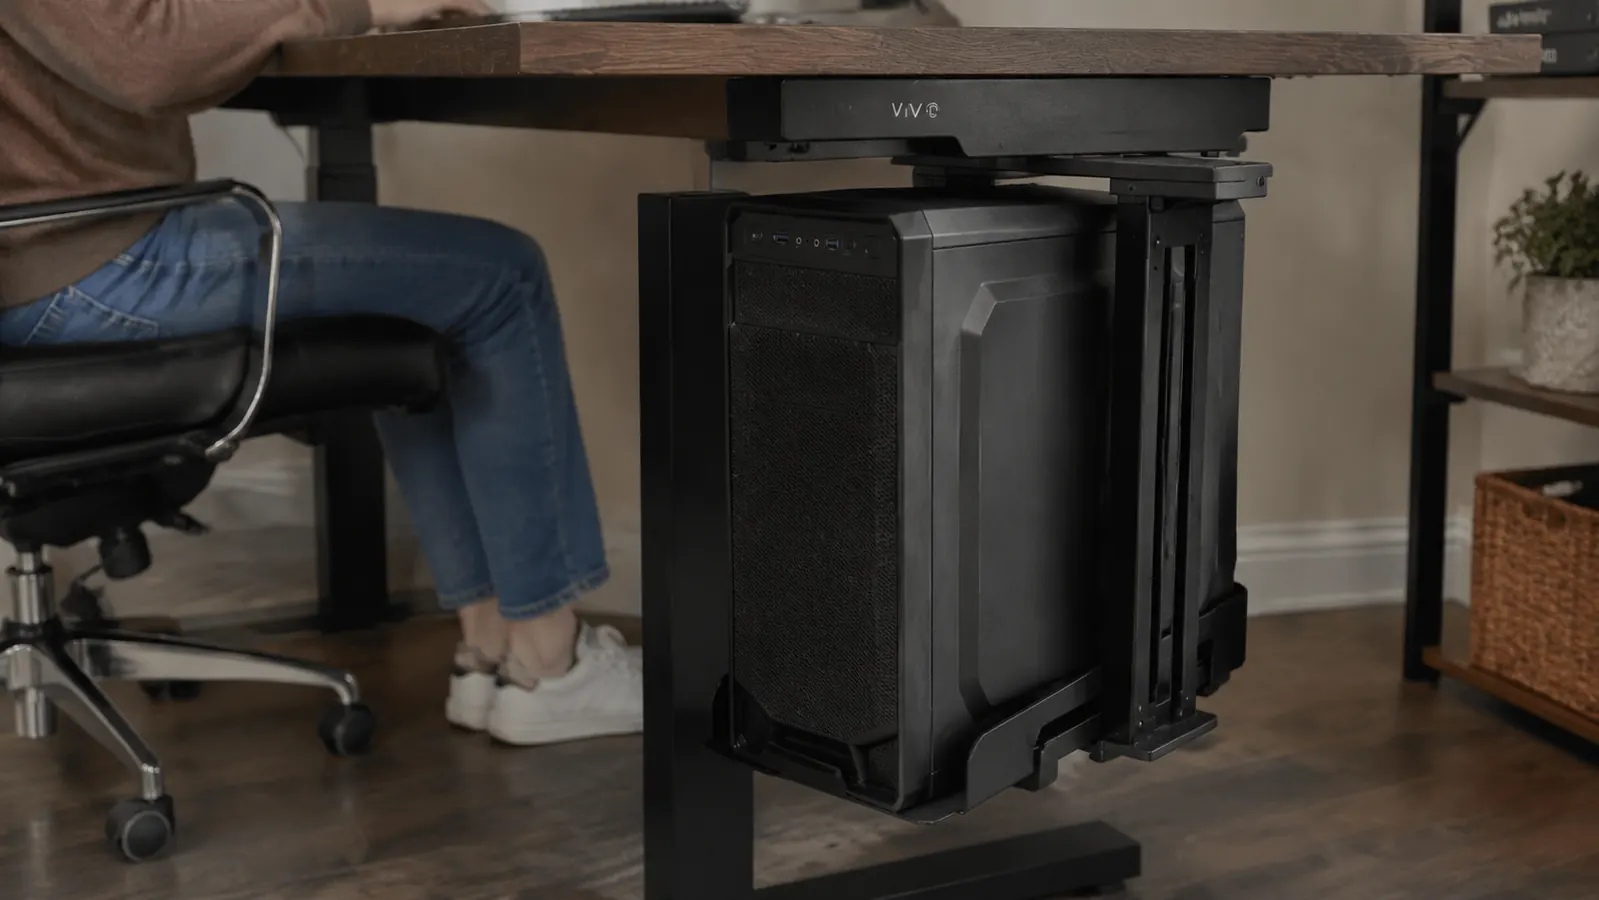
With the track secured, the cradle that holds the tower slides onto it and locks in place at whatever depth you need. Slide it to the back of the desk first, out of the way, then bring your tower over and set it into the cradle's arms. The VIVO mount's arms adjust independently on each side, so you widen or narrow the grip until the case sits snug without the arms digging into the side panels.
Tighten the adjustment knobs by hand until the case stops shifting when you nudge it. You're not trying to crush the case, just remove the wobble. I usually give it a firm shake test at this point, side to side and front to back, before I trust it with the real weight of a loaded tower. If anything moves more than a quarter inch, snug the knobs down a bit further before moving on.
Keep in mind the 22 lb weight rating printed on the spec sheet. Most mini towers and mid towers land well under that, usually in the 12 to 18 lb range fully loaded, but if you're running a full tower with three or four drives and heavy cooling, weigh it on a bathroom scale first. I've only hit that ceiling once, with a client's water-cooled rig repurposed for video editing, and we ended up going with a floor-standing setup for that particular machine instead.
Step 4: Reconnect Cables and Slide the Tower Into Position
Now reconnect every cable while the tower is still sitting out where you can reach the back panel easily, power, monitor, keyboard, mouse, and anything else. This is the step people try to skip by connecting everything after the tower is already tucked under the desk, and it almost always ends with someone lying on their back trying to find a USB port by feel. Do it now, while you can still see the ports clearly.
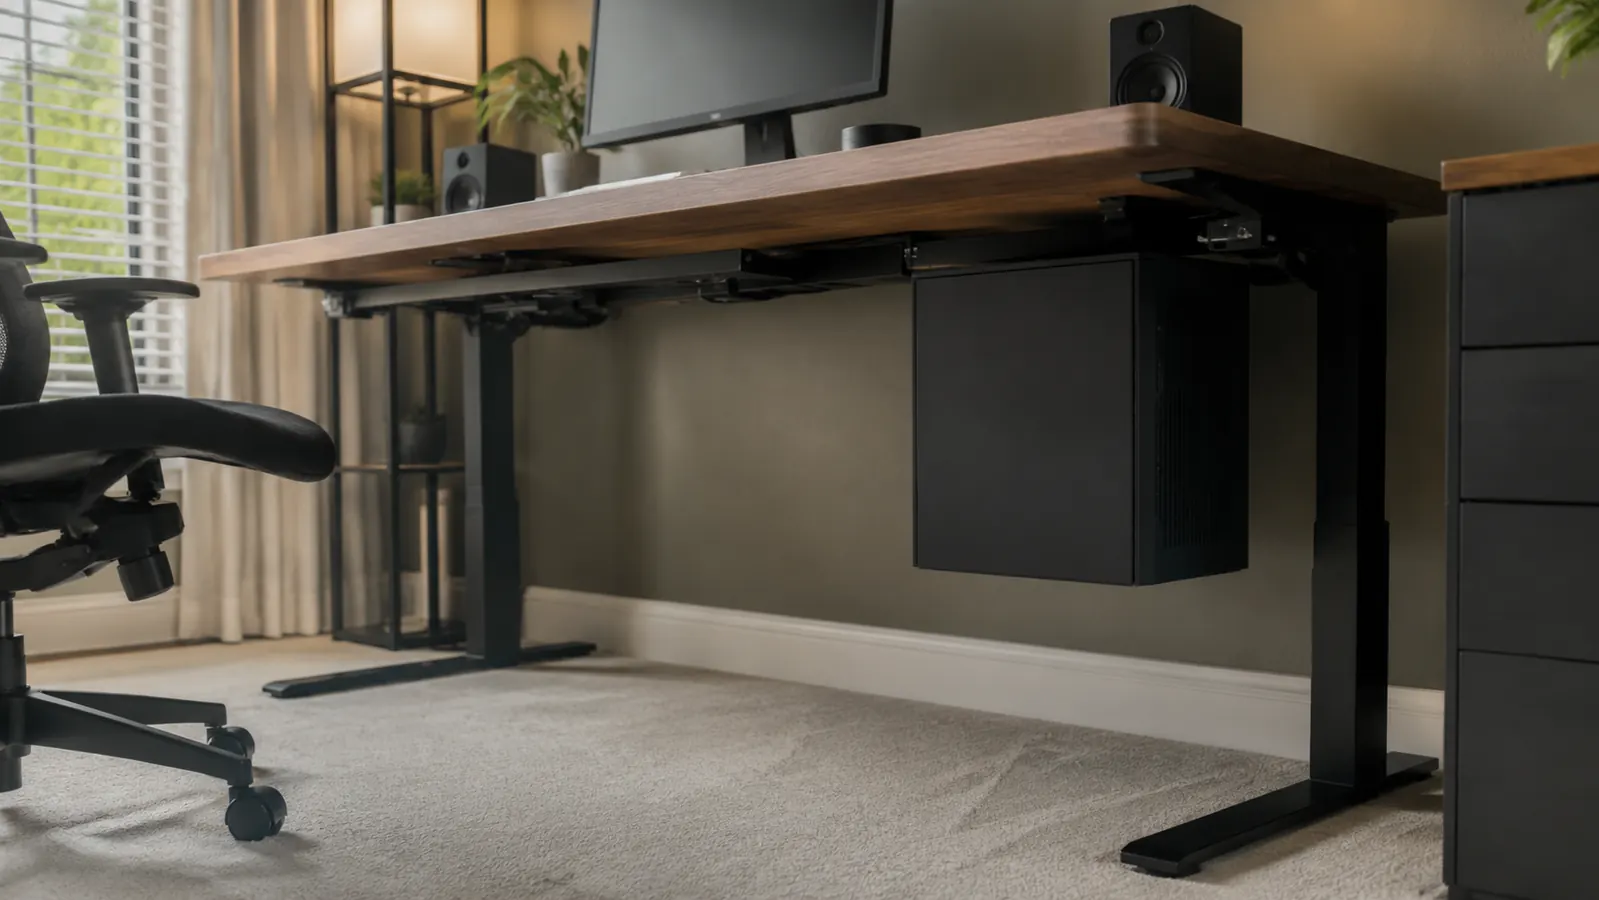
Once everything is connected and you've confirmed the machine boots normally, slide the whole cradle assembly, tower and all, along the track until it's tucked under the desk out of the way. Leave yourself a little room to swing it back out later for cleaning or a hardware upgrade. That swivel is the entire reason I recommend a track-and-cradle mount over a fixed wall bracket, it turns a five-minute cable change into an actual five-minute job instead of a floor crawl.
While you're back there, use a couple of adhesive cable clips along the underside of the desk to keep the power cord and monitor cable from swinging loose when the tower moves on its track. It's a five-minute add-on and it's the difference between a clean setup and one where cables are slapping against your knee every time you shift in your chair.
Step 5: Test the Swivel, the Lock, and the Airflow
Swing the tower out on its track a few times to confirm it moves smoothly and locks solidly when you push it back into place. Check that no cable is pinched or stretched tight at either end of the swing. If a cable is under tension when the tower is tucked away, add a little slack now rather than finding a torn connector in six months.
Last, check the clearance around the intake and exhaust vents on the case now that it's mounted. The whole point of getting the tower off the carpet is better airflow, so don't undo that by cinching it right up against a desk leg or a wall that blocks the fan intake. Give it at least a couple of inches of breathing room on the vent side.
Give the whole setup one more once-over, track screws snug, cradle knobs tight, cables clear, vents unobstructed. Power the machine back on and let it run for twenty minutes while you work normally, then reach under and check the case temperature by hand. It should feel no warmer than it did sitting on the floor, and in most cases it will feel noticeably cooler within the first week.
What Else Helps
A CPU mount solves the floor problem, but it doesn't solve cable clutter or dust on its own. I'd pair it with a couple of cable clips along the track to keep the power and monitor cords from swinging loose, and a can of compressed air every couple of months to keep those intake vents clear now that they're finally getting real airflow instead of carpet fibers. Some of my clients also add a small under-desk shelf next to the mount for a router or a small backup battery, since that floor space suddenly opens back up once the tower isn't sitting on it anymore. If you're still deciding whether a mount is worth the twenty minutes over just leaving the tower on the floor, I broke down the real tradeoffs in an honest comparison against a floor-standing setup, and if you want the full picture of what shows up over time, I wrote up an honest review covering what I liked and what I'd change.
The mount doesn't just get the tower off the floor, it gets you off the floor too, every time you need to plug something in.
I've now got this exact mount running in three different offices I manage, including my own, and the only maintenance any of them have needed is an occasional wipe-down of the swivel arm. If you want the day-to-day detail of living with one, that long-term writeup covers six months of daily use, dust included. Twenty minutes of work up front and you stop thinking about the tower entirely, which is really the whole goal.
Twenty minutes now beats another six months of dust bunnies
This under-desk mount holds up to 22 lbs, adjusts to fit most towers, and swivels out on command whenever you need to plug something in. Check today's price and current availability on Amazon before your next cleaning day.
Amazon Check Today's Price on Amazon →